When I discovered the basics of homemade broth, my heart sang. Something to do with kitchen scraps! That made something delicious! For free!
You can find directions for homemade broth all over the internet; however, here is my technique.
Step one: Every time you cook, throw your vegetables scraps in a tupperware in the freezer. You can be as picky or as lax as you want to be. Mine varies from season to season, but usually is a combination of onion and carrot tops; scraps from trimming celery, peppers, and tomatoes; garlic, potato and squash peels; corncobs; apple cores; and anything else that has a nice flavor but doesn't make it into the pot.
Step two: When you have a good collection of scraps going (about 1 quart), dump it into a big soup pot and add whatever is in the fridge and about to go bad. I usually end up adding wrinkled or excess greens (spinach, mustard and turnip greens, cabbage) and any leftover vegetables that are largely unseasoned. Add a chopped up onion or two as well, and the wimpy little center stalks of celery if you have them on hand.
Here you can see my collection from my last batch:
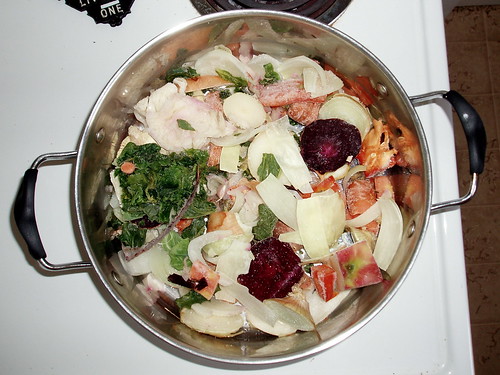
As you can see some beet tops made their way in. Beets are super in broth because they give it a lovely sweet taste and a gorgeous pink color.
Step three: Fill the pot with water and add seasoning. I usually throw in 2 bay leaves and about a teaspoon of whole peppercorns. If I'm feeling saucy I'd throw in a half-teaspoon of turmeric. Add whatever you want! I don't salt until the end so that I can add the minimum necessary to make the flavor pop.
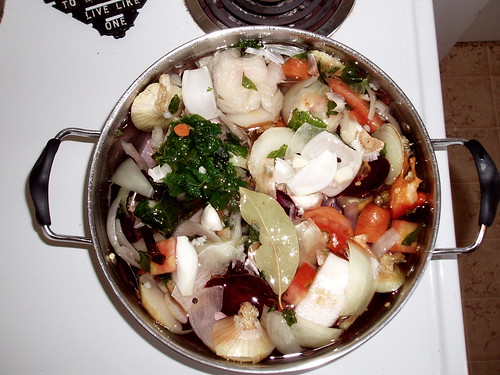
Step four: Bring to a boil and simmer for about an hour. Unlike meat-based broths you really don't need a very long simmer to get a deep, complex taste. This step also makes this a great kitchen-warming activity for a chilly winter morning.
Step five: Once you are happy with the flavor cut the heat and let the broth cool. I always rush this step and burn my mouth here while tasting to salt.
Step six: Strain the broth. I pour the soup through a colander to get out all the now mushy and disgusting vegetables. If the soup is very cloudy I'll strain it again through cheesecloth. This batch was pretty clear, so I didn't bother to strain it a second time.
Step seven: BEHOLD! BROTH!
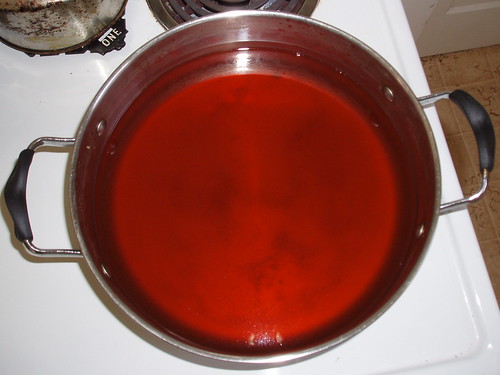
This stuff is seriously 100 times better then anything you can buy in the store, and loaded with nutrients. And you made it for free!
I like to freeze it in (reused) ziplocks and old yogurt tubs in 2-cup quantities, so I can defrost one to make rice or defrost the whole lot and make soup. Tomorrow a bunch of this batch is going to be made into crockpot potato-garlic soup. Yum!
BONUS FEATURE:
Hey, you should probably make some bagels. I made some bagels on Sunday. Do you want to see?
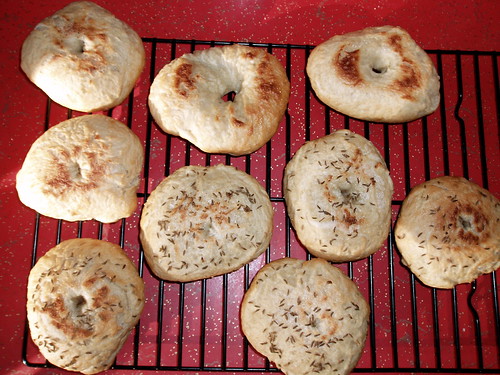
Oh? Not impressed? Maybe you'll be impressed by... MOODILY LIT FILM NOIR BAGELS!
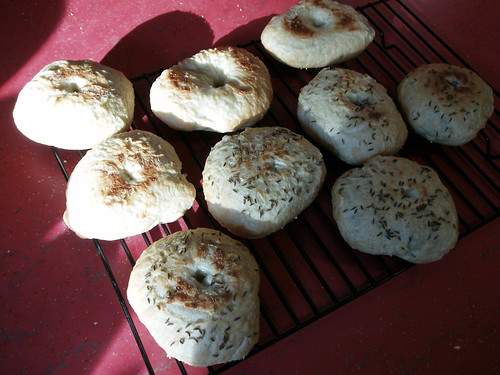
The film noir adaptation is apt, since these are not ordinary run-of-the-mill bagels, but rather fancy Parisian bagels. I made them using the recipe found here: JO GOLDENBERG’S PARISIAN BAGELS
My thoughts on the recipe:
1) Don't add too much flour. This is a sticky dough and it's easy to keep adding flour, which will cause your bagels to fall in the oven. Add the minimum amount of flour and keep a big wooden spoon handy to scrape your kneading surface clean.
2) Keep an eye on the dough during the first rise. My dough was ready to go after only 40 minutes (then again, I am blessed to live in a climate that is still fairly warm).
3) 400 degrees seems way to hot for these little guys. I would set the oven for 350 and adjust from there.
These bagels are delicious, have a strong yeasty taste and freeze well. Make them and enjoy - they are a fun, quick yeast bread and well worth the time spent.
ah, just the post i needed to start daydreaming about coldweather soups and mucho chili. yay!
ReplyDelete